PRODUCT PHOTOGRAPHY
Product photography is a branch of commercial photography which is about accurately but attractively representing a product. The principal application of product photography is in product catalogues, brochures, and online sales with a portion of product images also being used in advertising.
Commercial probably is often defined as any photography for which the photographer is paid for taking and possibly Photoshop retouching of images. Other areas of expertise include: Life-style photography, food photography, architectural photography and portraiture.
Professional product photography can make an enormous improvement in many website photography. Professionals understand using correct lighting, use of background materials, camera angle, camera focus and depth of field among other technical considerations.
The term commercial photography usually refers to photography used in advertising and marketing materials. This form of photography is intended to promote or sell a service or product. The photographic images are generally shot using traditional film and developing techniques or digital cameras with images directly imported into computers for use in designs and layouts.
With the proliferation of mobile device cameras many people are unfortunately mistaken to think they can therefore take professional level photographs suitable for marketing or advertising in print or on websites. Without a full understanding of composition and lighting and commonly used ‘professional’ equipment such as a tripod, many people sell their business presentation short with unprofessional images. In addition, most professional product photographers will handle the ‘post-production’ tasks of any needed retouching, cropping and photo enhancements.
STEP 1
Bring in a product that you are interesting in working with for this assignment. You will be taking your photos in class using the EZ Cube and studio lights. You must take 12 total photos of your object. 6 of these photos will be full view shots of the object which the other 6 will be close-up photos. You can take more than 12 photos, more is always better in photography.
STEP 2
Print out a contact sheet with at least 12 photos.
|
STEP 3
Choose 5 of your product photos to edit. Put them in a google slide presentation with before and after photos. Step 4 Create a pickmonkey collage with a minimum of 5 photos. You must have at least 2 full view shots and 2 detail shots. You can include more photos if you choose. Make sure the photos that you include in your collage have been edited, they don't necessarily have to be the same ones that were in your google slide presentation. When you are finished creating your collage, make sure you select the Export button and save to your Z:/ drive and then in the proper folder on the V:/drive. |
|
STEP 5
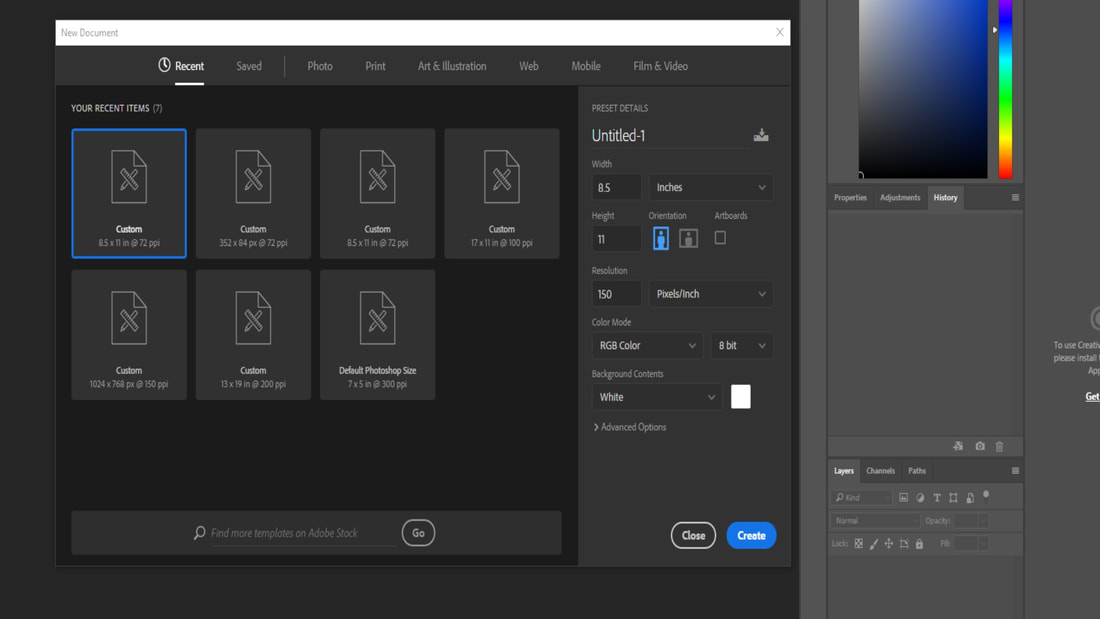
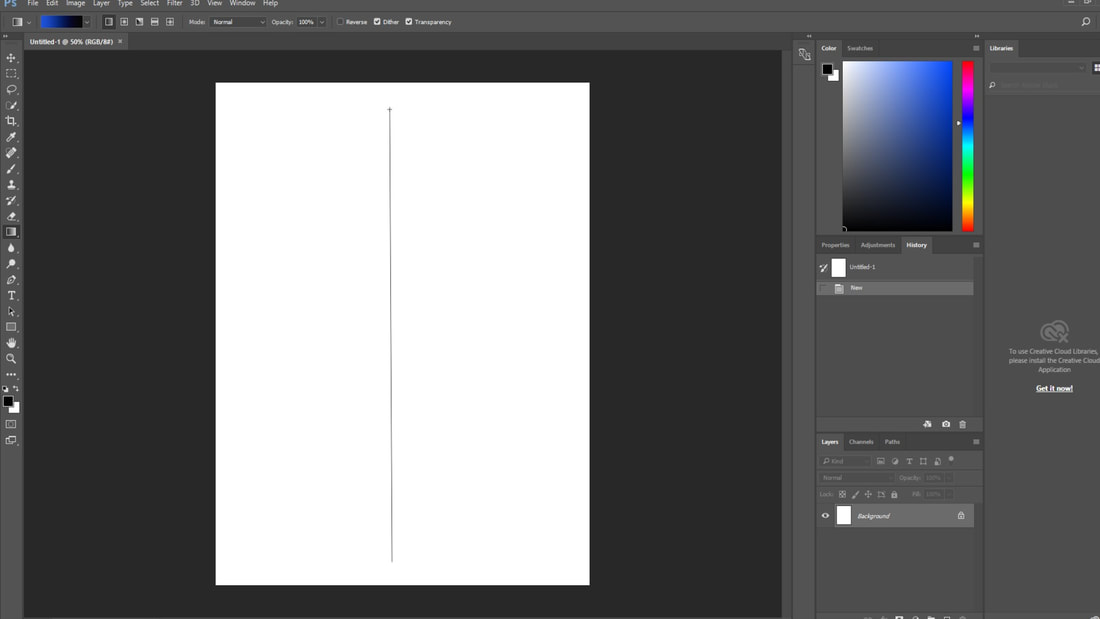
Create an advertisement using one or more of your product photos. Start by creating a Photoshop document. Open up Photoshop and select File>New. You can decide on the orientation of the page by selecting either 8.5x11 or 11x8.5 inches. Make sure the resolution is set to 150 and the color mode is RGB.
Create an advertisement using one or more of your product photos. Start by creating a Photoshop document. Open up Photoshop and select File>New. You can decide on the orientation of the page by selecting either 8.5x11 or 11x8.5 inches. Make sure the resolution is set to 150 and the color mode is RGB.
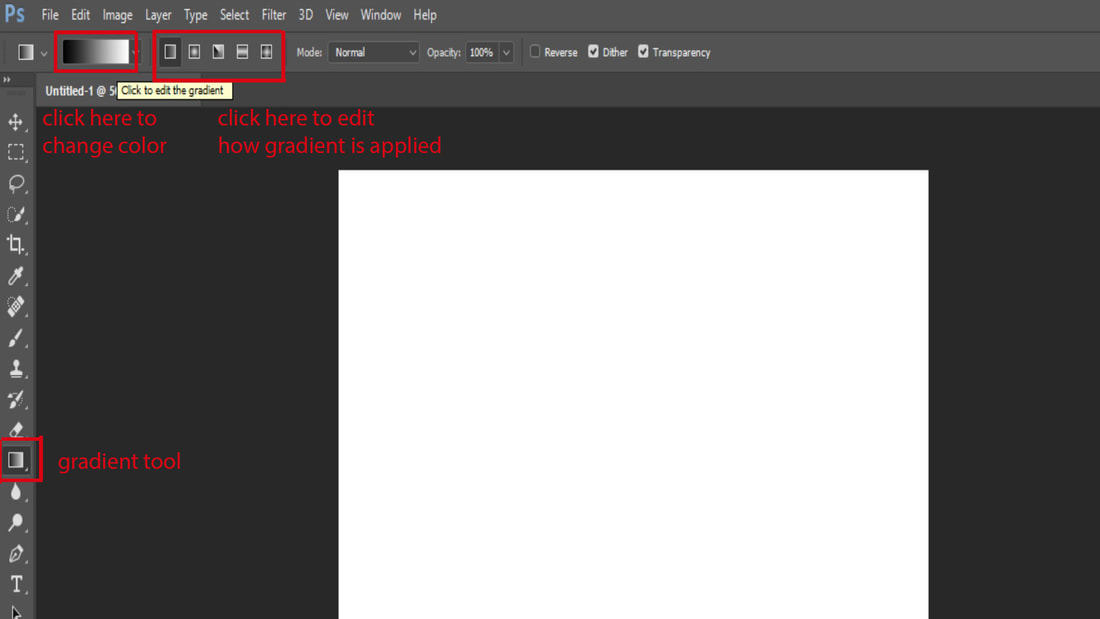
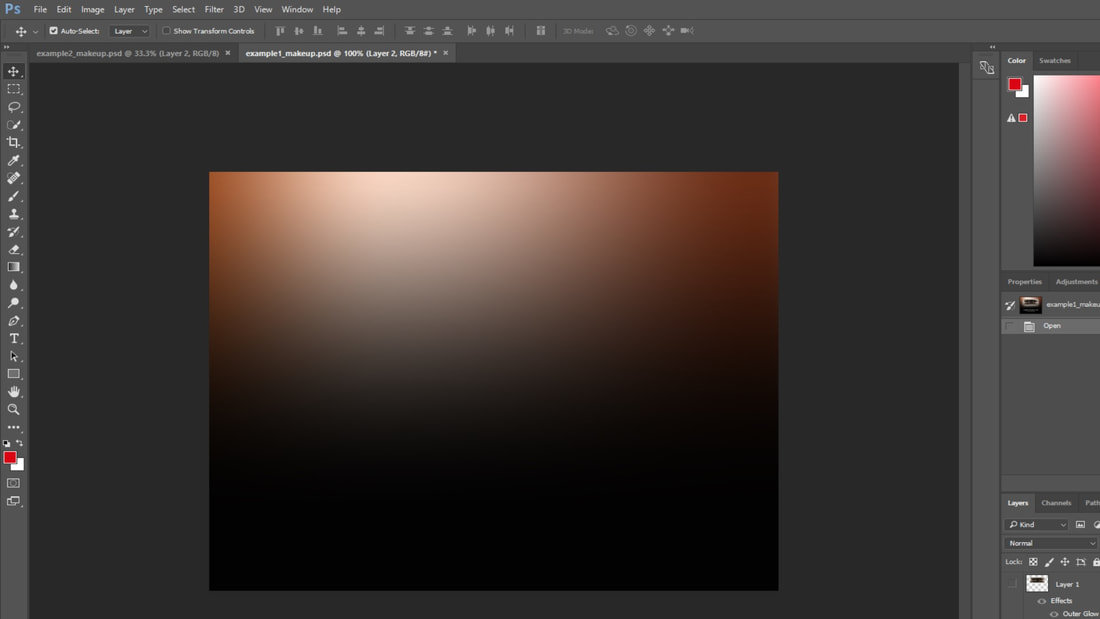
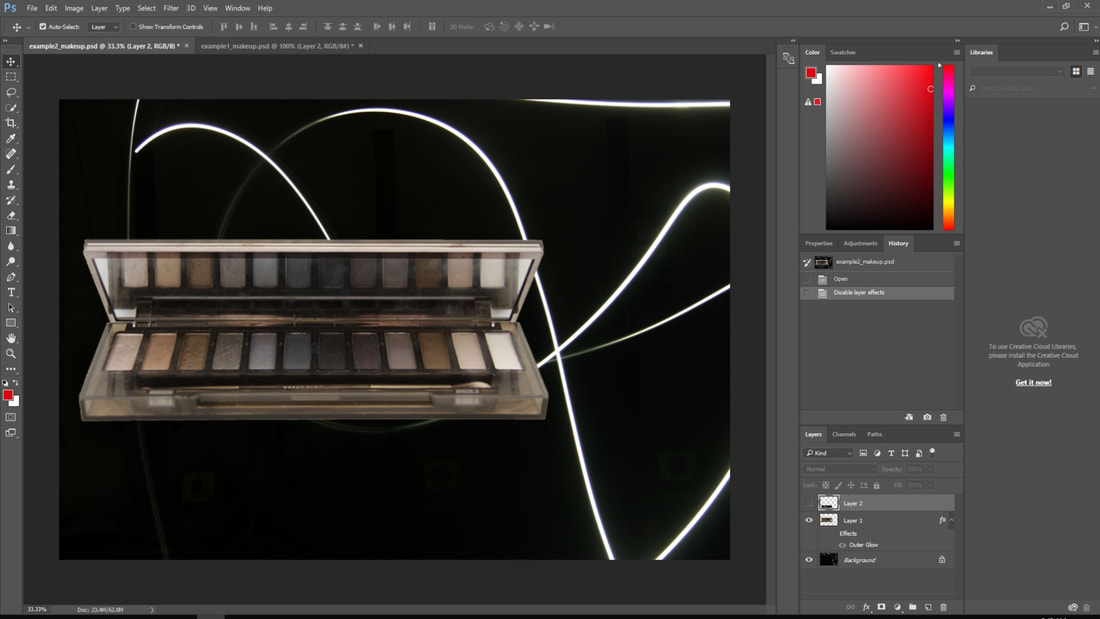
Next, decide on a background for your ad. You can either choose a Gradient or one of your light painting photos.

GRADIENT
|

LIGHT PAINTING
|
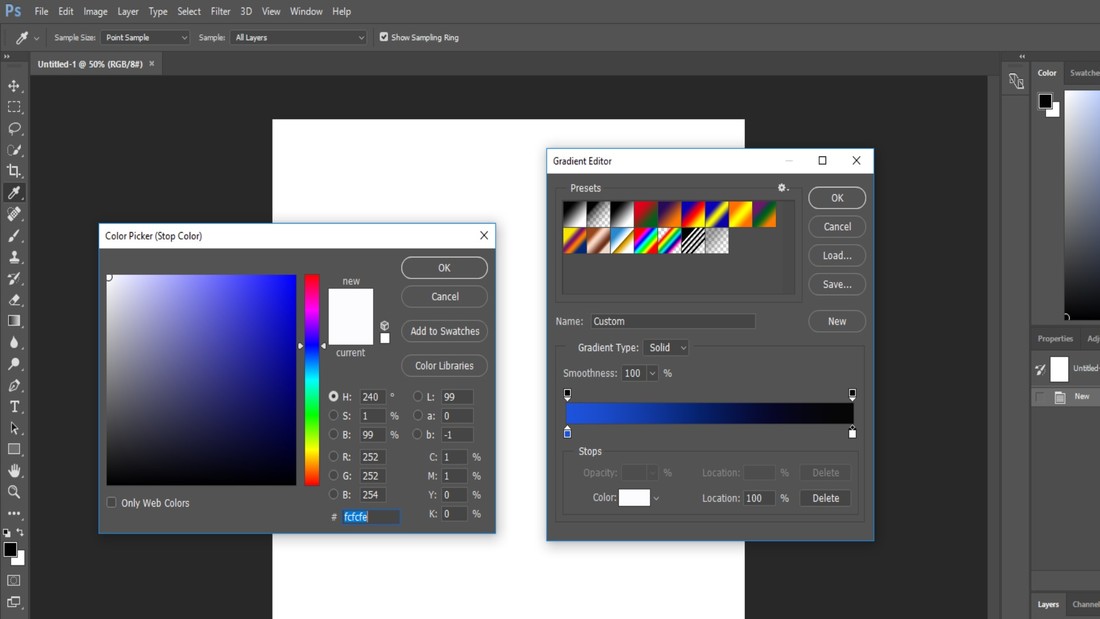
If you want a gradient, continue with some of the following steps. First, click on the gradient tool on the left. In order to edit the way the gradient is applied, click on the options along the top bar. To change the colors of the gradient, click on the gradient in the top bar.
|
|
Next, click and pull the gradient across the page in the direction you would like the gradient applied. You can do this a few times until you get it how you want it.
|
|
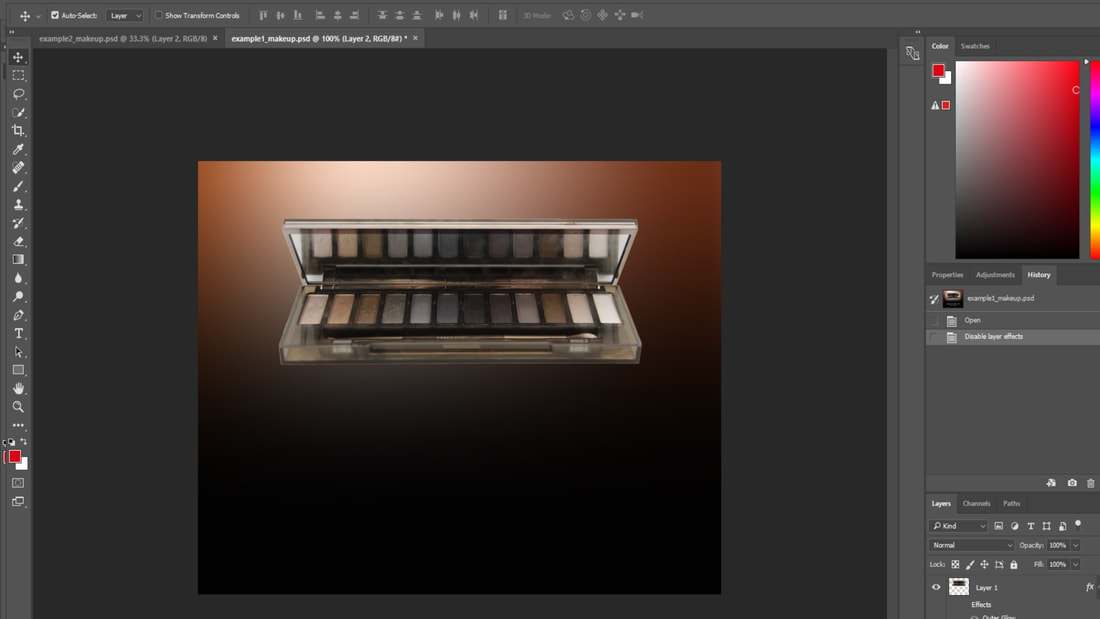
Next, look through your product photography photos and select the photo you would like to use for the advertisement. You may use more than one if you want. Use the Quick Selection tool to select the object from the background and mask it. Then drag your selection on to your background. Resize and move around your selected product as you see fit.
|
|
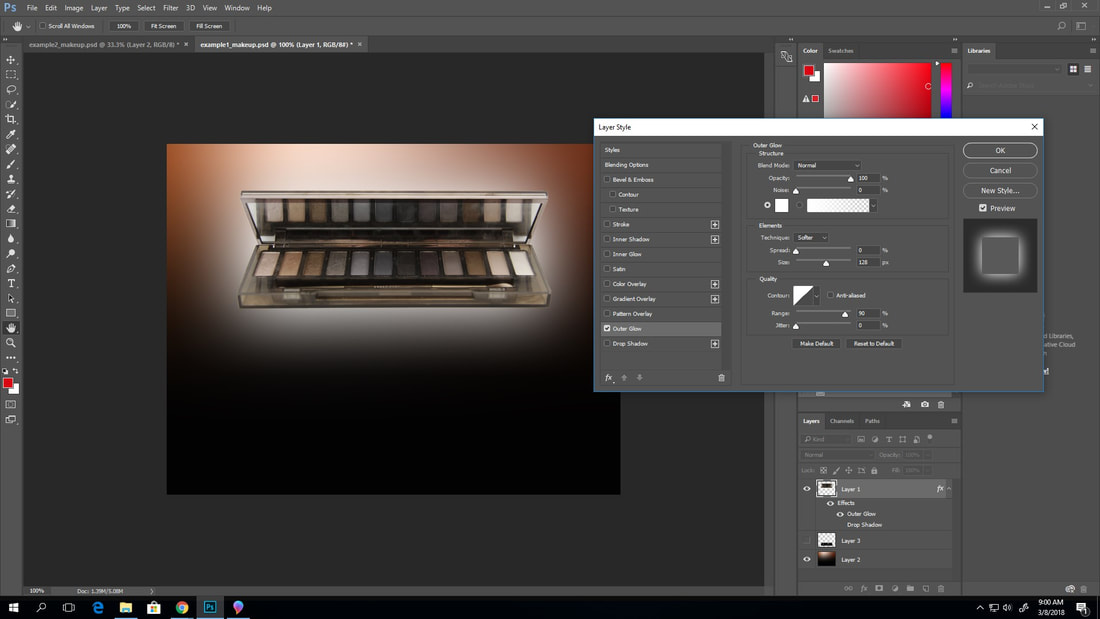
Now you can put a glow or outline around your selected product. This will help to ground the object and make it look a little less like it is floating or cut out of a magazine. Right click on the layer that has your selected product and select Blending Options.
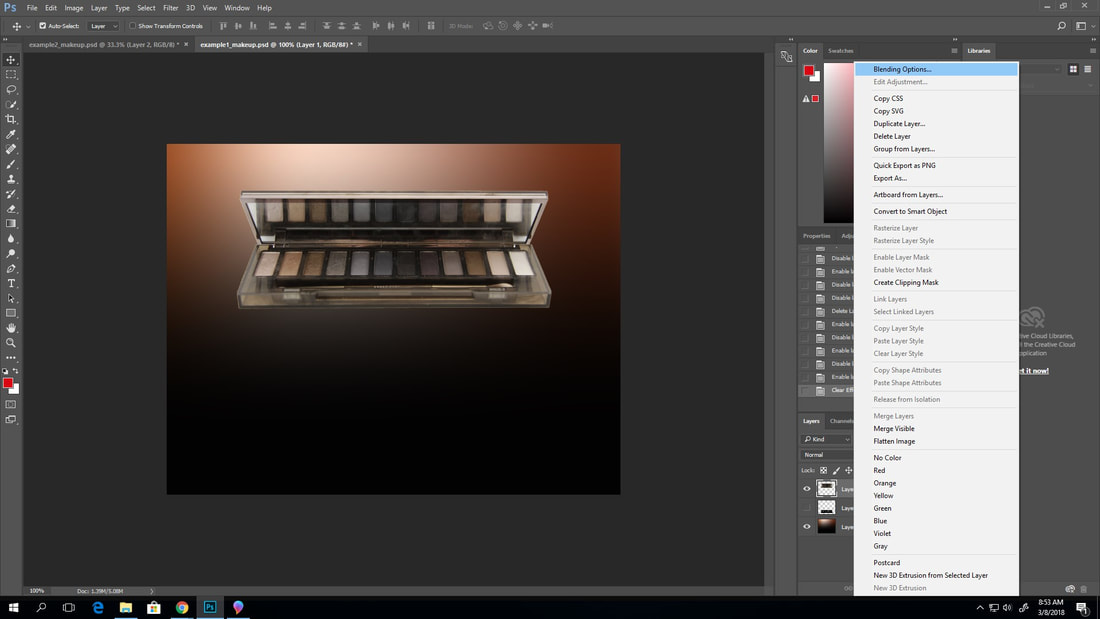
You can decide whether you would like an outer glow, how much, how far, etc. Other possible options that could work would be Bevel & Emboss, Stroke, Drop Shadow, etc.
Next, google search for the logo and slogan that goes along with your product. Save a copy to your Z:/drive and open it up in photoshop. You may have to make a selection of your logo or you may be able to just drag your logo onto your advertisement. Resize and move around the logo as you see fit.
When you are finished save it to the appropriate folder on the V:/ drive.