Segmented Portraits
Directions
Segmented Portraits uses the three panels to display the feet, midsection and face of his subjects—surprisingly, these three portions of people can give a lot of insight into their personality.
Take 3 photos - a person’s feet, midsection (include their hand or hands) and their face. Have your brother, sister, parents or friends be your subject. You might also want to team up here at school with three other people, take several photos of them around school to get different subjects for this project.
When you compose and take these photos make sure you zoom in pretty close and take a good in focus photo. Retake these if they are not in focus!
Step 1
Open Photoshop CS6
Step 2
Open this template – Segmented Portrait Template.psd located on the V: drive > Digital Photography folder. It looks like this:

Step 3
Open the 3 photos you took (face, hands-midsection, feet) in Photoshop and bring them into the new document you just made.
Step 4
Move the photo of your persons face in the layer palette above the layer called Put Face photo here.
Adjust this photo to fit the area to the first white line. Increase or decrease the size of this layer if desired to get different looks.

Step 5
Get your face photo to fit inside the top area and stop at the first white line.
Get your face photo to fit inside the top area and stop at the first white line.

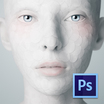
This is the result you should get after applying the clipping mask on the face.

Step 6
Now, move the photo of your midsection and feet above the layers Put midsection photo here, Feet photo here as well, and do the same steps as you just did in Step 5 above.
Adjust these photos to fit the areas. Increase or decrease the size of this layer if desired to get different looks.
Step 7
Turn on the visibility of the Black and White Adjustment Layer and see the entire photo in Black and white.

Step 8
Save this on the V: drive > Digital Photography > Period 2 > that specific projects folder > Your Last Name_Segmented Portrtaits-1.psd
Step 9
Complete a second and third one as well. Use a different photo of yourself for each of these.
Save this on the V: drive > Digital Photography > Period 2 > that specific projects folder > Your Last Name_Segmented Portrtaits-2.psd and Your Last Name_Segmented Portrtaits-3.psd.
Step 10
Save ALL three of these as a JPG file.
File > Save a Copy and change the File type to : JPG. Your Last Name_Segmented Portrtaits-1.JPG,Your Last Name_Segmented Portrtaits-2.JPG and Your Last Name_Segmented Portrtaits-3.JPG
Step 11
Bring these 3 JPG files (one at a time) to BeFunky and add effects, adjustment, like our Portrait projects.
Step 12
Save these as Your Last Name_Segmented Portraits-1, 2, 3 to your Z: drive.
Step 13
Finally, save ALL 3 of the original.psd files and your 3 BeFunky edits to the correct project folder for grading on the V: drive!
Examples